Start an Instance of the Image
With the image pushed to your provider account, you can start instances when desired.
We’ll take you through starting an instance of the image using Aeolus’s web interface. Then, if you’re using Amazon EC2, we’ll show you how to connect to that image remotely using SSH.
Getting Started Guide
1. Create a Catalog and Deployable
Create a deployable XML file with the following content. Use the Image ID generated when you pushed the built image. Save it to your local filesystem, for use in a moment.
<deployable name="My Deployable">
  <description>This is an example deployment</description>
  <assemblies>
    <assembly name="samplehost" hwp="hwp1">
      <image id="609a6eee-5ec5-4b13-8486-7491d091f8dc" />
    </assembly>
  </assemblies>
</deployable>
NOTE - Get the Image ID value (above) from the aeolus-image build
command on the previous page.
If you’ve lost it, type:
aeolus-image list --images
to see all images and their IDs.
- In the Aeolus web interface, go to Administer ⇒ Content.
- Click the “New Catalog” button. Give your catalog a name, associate it with the Default pool, and save it.
- Click on the name of your new catalog. Click on the “New Deployable” button. Give your entry a name, description, and upload the deployable XML file you created. Save your new deployable.
-
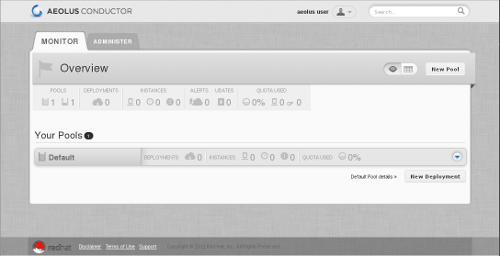
In the Aeolus web interface, go to the Monitor tab.
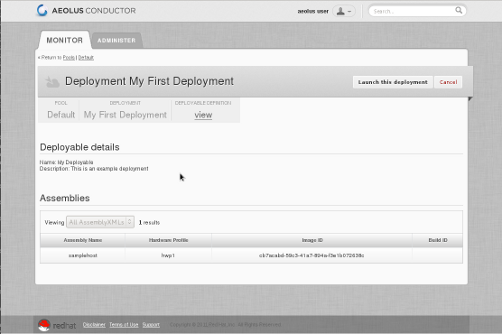
Under “Your Pools” is the default pool. On the right side of the default pool there’s an arrow. Click the arrow and it will expose the button “New Deployment”. Click the “New Deployment” button: - Give your deployment a name and upload the deployable you just created. Click the Next button.
-
To launch the deployment click the “Launch” button.
Aeolus will then launch an instance of the template, using the AMI created on the previous page.
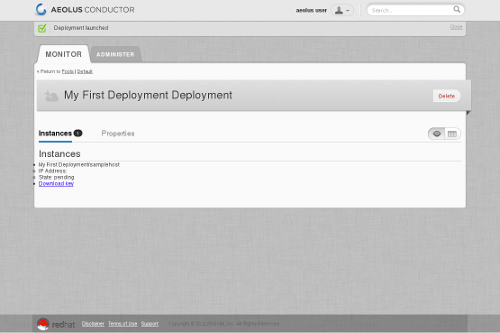
The main view will list your instances, with the message “Deployment launched.” near the top:
Within a minute or two, the State field for the instance should change to “running”. The state will automatically be updated on the page; there is no need to refresh the page.
If you are using Amazon EC2, follow the next steps to complete your configuration.
2. Configure EC2 for SSH connections
By default, Amazon EC2 does not allow network connections to instances.
If you want to use SSH with them, it needs to be enabled in the EC2 Security Groups settings:
- In the Amazon AWS Management Console, go to EC2 ⇒ Security Groups.
- Click on the default security group.
This displays the details for the default security group, in the lower part of the window. - Click on the Inbound tab.
- For the Create a new rule selector, choose SSH.
- Click the Add Rule button.
-
Click the Apply Rule Changes button just below it.
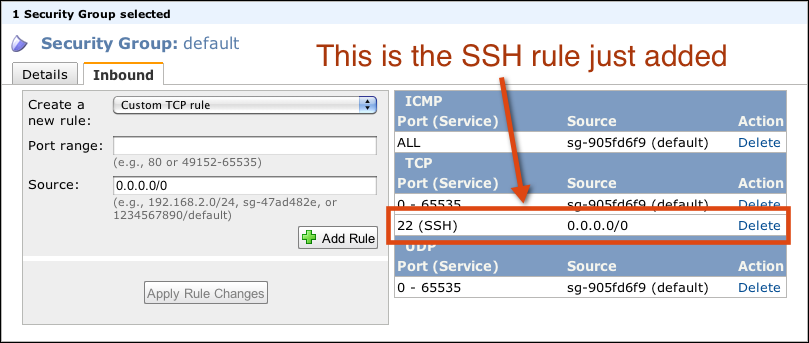
EC2 now allows SSH connections to your instances.
3. Retrieve the Private SSH Key
To connect to the new running instance using SSH, you need the private key generated for it:
- In the Aeolus web interface, click the MONITOR tab.
- Click the name of the new running instance. My First Deployment in the above screenshot.
-
Click the Download Key link to bring up a download dialog for the SSH private key file:
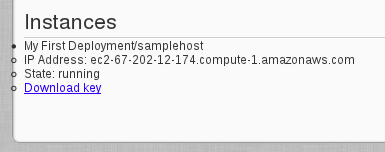
- Save the private key with a name such as instance_1_private_key.pem.
-
Tighten the permissions of the saved private file to only allow access by yourself, and only read access:
$ chmod 400 instance_1_private_key.pemIMPORTANT: This is because SSH will refuse to use any private key with insecure permissions.
4. Connect to the instance
Now we connect to the new running instance using SSH:
-
Get the public address of the instance from the instance list on the same screen the ssh key came from:

- Launch a terminal session on your desktop.
-
In the terminal session, start ssh, passing it the name of the private key file for the instance with the “-i” option, giving the root user, and giving the public address of the instance:
$ ssh -i instance_1_private_key.pem root@ec2-67-202-12-174.compute-1.amazonaws.com The authenticity of host ‘ec2-67-202-12-174.compute-1.amazonaws.com (67.202.12.174)’ can’t be established. RSA key fingerprint is 09:94:bc:be:1c:a0:7c:8b:50:e5:bf:42:8c:cf:86:1b. Are you sure you want to continue connecting (yes/no)? yes Warning: Permanently added ‘ec2-67-202-12-174.compute-1.amazonaws.com,67.202.12.174’ (RSA) to the list of known hosts. [root@localhost ~]#
You are now logged into the running Fedora 16 instance as the root user.
IMPORTANT: Changes to the file system persist across reboots, but are lost when it is shut down. This means a yum update (then reboot) will be needed each time the instance is started.


