Configure your Cloud Providers
On this page we configure Aeolus for Mock, a pretend Cloud Provider. It is useful for demonstration and testing purposes.
We also (optionally) configure for EC2. This requires an existing Amazon AWS account. You can skip this part if you want.
Which provider would you like to configure?
Getting Started Guide
Mock Provider
1. Confirm the Mock Provider account exists
The mock provider account should already exist. Follow these steps to confirm.
- In the Aeolus web interface go to Administer ⇒ Cloud Providers.
- Choose the mock provider in the upper right hand corner.
- Click “Accounts” just below the choose provider selector.
- An account name “mock” should already exist.
If the account doesn’t exist, you can create it by following these steps:
- From the Accounts page, Click the “New Account” button.
- For Account name use “mock”. For Username use “mockuser”. For Password use “mockpassword”.
Amazon EC2
WARNING: Amazon and other Cloud providers charge fees for using their products and services, including EC2.
Setting up EC2 with Aeolus means your Amazon EC2 account will be billed with their appropriate usage charges as you follow this guide and/or try things out.
We ARE NOT responsible for any EC2 or other Cloud fees and charges you may incur.
As a precaution after finishing every Aeolus testing session, you must manually check all storage and instances in Amazon have been terminated and removed as you expect.
Development versions of Aeolus have on occasion been known to report instances as stopped when they are in fact still running in EC2, thereby incurring charges from Amazon.
BE CAREFUL!
1. Configure EC2 credentials in Aeolus
Follow these steps to configure Amazon EC2 with Aeolus.
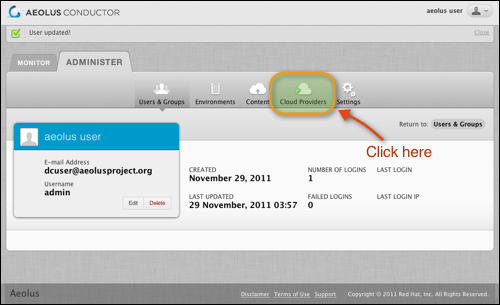
In the Administer tab, click the Cloud Providers button. This switches to a view showing the configured Cloud Providers.
Amazon EC2 was automatically populated by the aeolus-configure command we gave earlier. It includes:
- ec2-us-east-1
- ec2-us-west-1
- ec2-us-west-2
- ec2-eu-west-1
- ec2-ap-northeast-1
- ec2-ap-southeast-1
At the top of the Cloud Providers page, there is a drop down list listing available providers. You should see the
above list of providers, and you can select whichever region you wish to use.
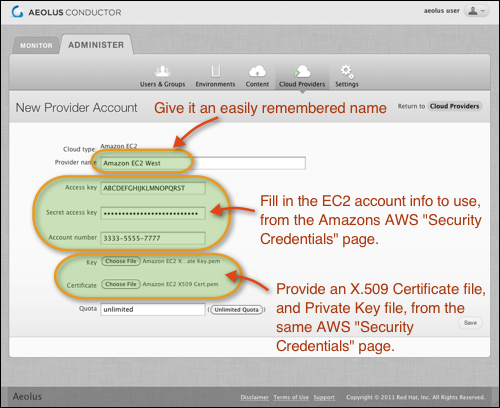
With a provider selected, press the “Accounts” button, and then choose “New Account.”
Fill in the EC2 account details, with your Amazon AWS account info. The information you need from Amazon is on their AWS Security ⇒ Security Credentials page.
When you are done, click the “Save button”.
2. Verify the account details work
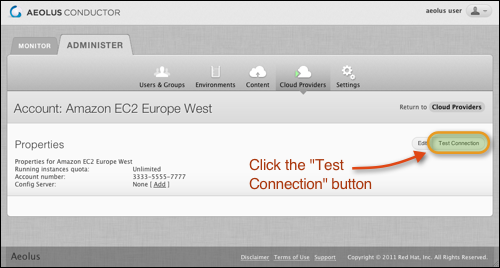
After saving the account above, you can press the “Test Connection” button to test your credentials.


